Creating Cosmetics with CraftEngine
This guide is intended for creating cosmetics using the CraftEngine plugin.
Hat
yaml
# Example YAML configuration for creating a hat with CraftEngine.
cosmetics:
  mexican_hat:
    permission: 'cosmetics.mexican_hat' # permission to use the hat
    item:
      display: '&bMexican Hat'
      craft-engine: 'pack_id:mex_hat' # Hat item ID from CraftEngine
      lore:
        - ''
        - '&6Very Mexican!'
      unbreakable: true # item is unbreakable
      glow: false # no glowing effect
      hide-attributes: true # hides item attributes
      modeldata: -1 # model data is not required here (managed by CraftEngine)
    colored: true # hat can be dyed/colored
    type: HAT # cosmetic type: hat
    overlaps: true # If this option is enabled, you can wear a helmet and a hat at the same time.
Backpack
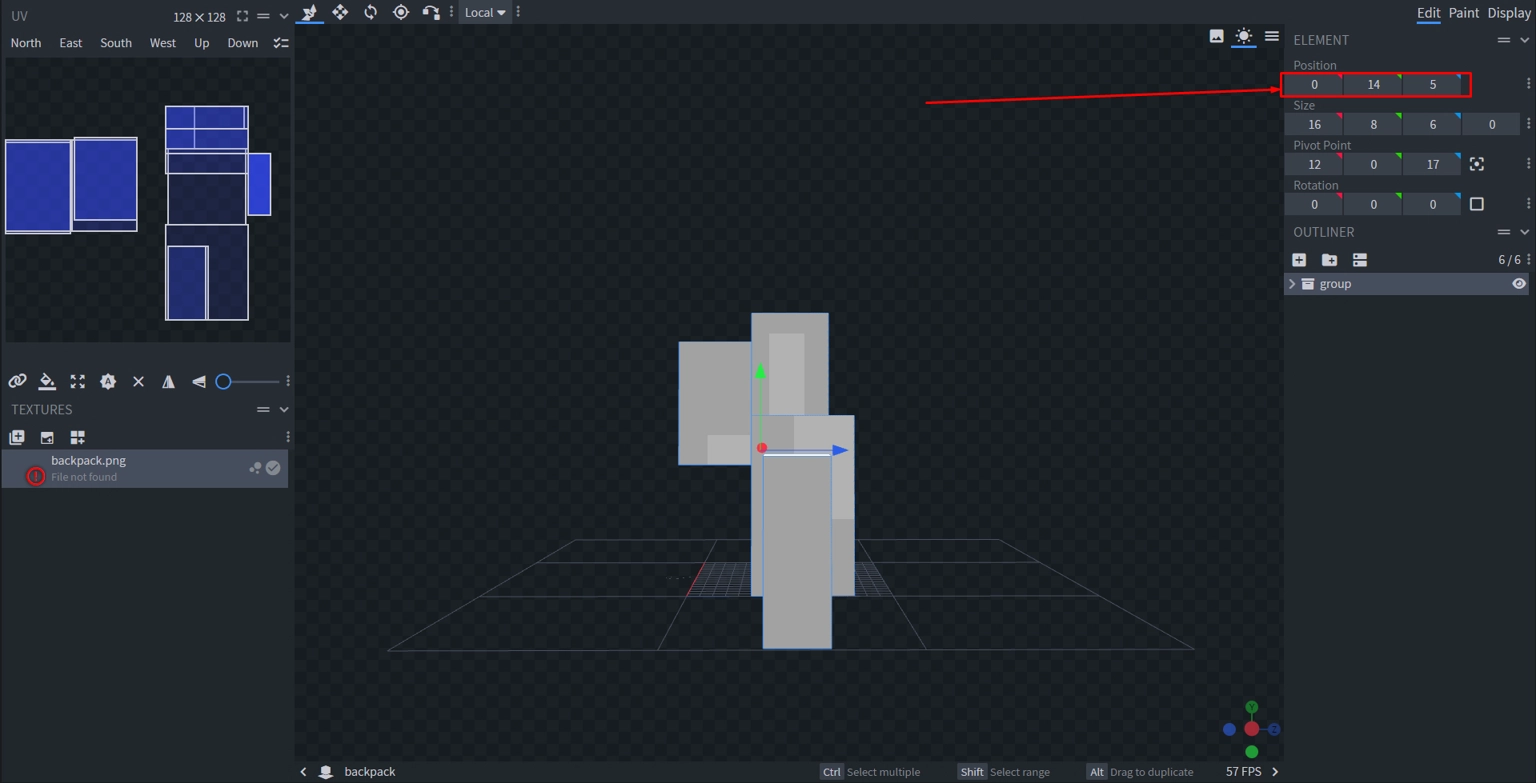
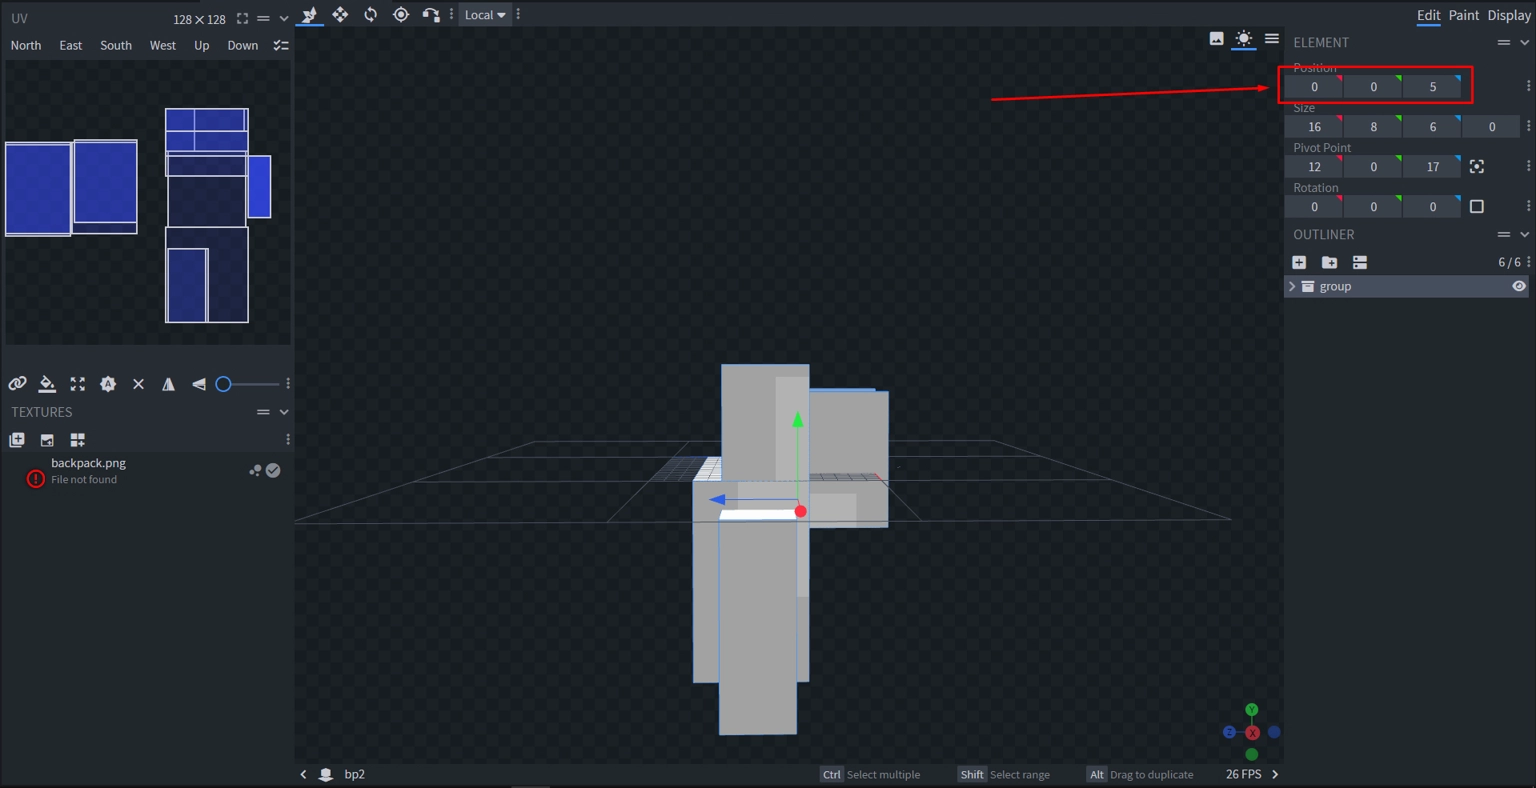
Here is how a normal backpack is created:
- Cosmetic file:
yaml
# Example YAML configuration for creating a normal backpack with CraftEngine.
cosmetics:
  creeper_backpack:
    permission: 'cosmetics.creeper_backpack' # permission to use the backpack
    item:
      display: '&bCreeper Backpack'
      craft-engine: 'pack_id:backpack' # Backpack item ID from CraftEngine that everyone will see.
      lore:
        - ''
        - '&aSupport the creepers!'
      unbreakable: true
      glow: false
      hide-attributes: true
      modeldata: -1 # model data is not required here.
    colored: true # backpack can be dyed/colored
    type: BAG # cosmetic type: backpack
distance: 100 # distance at which players will be able to see the backpack.- BlockBench file:
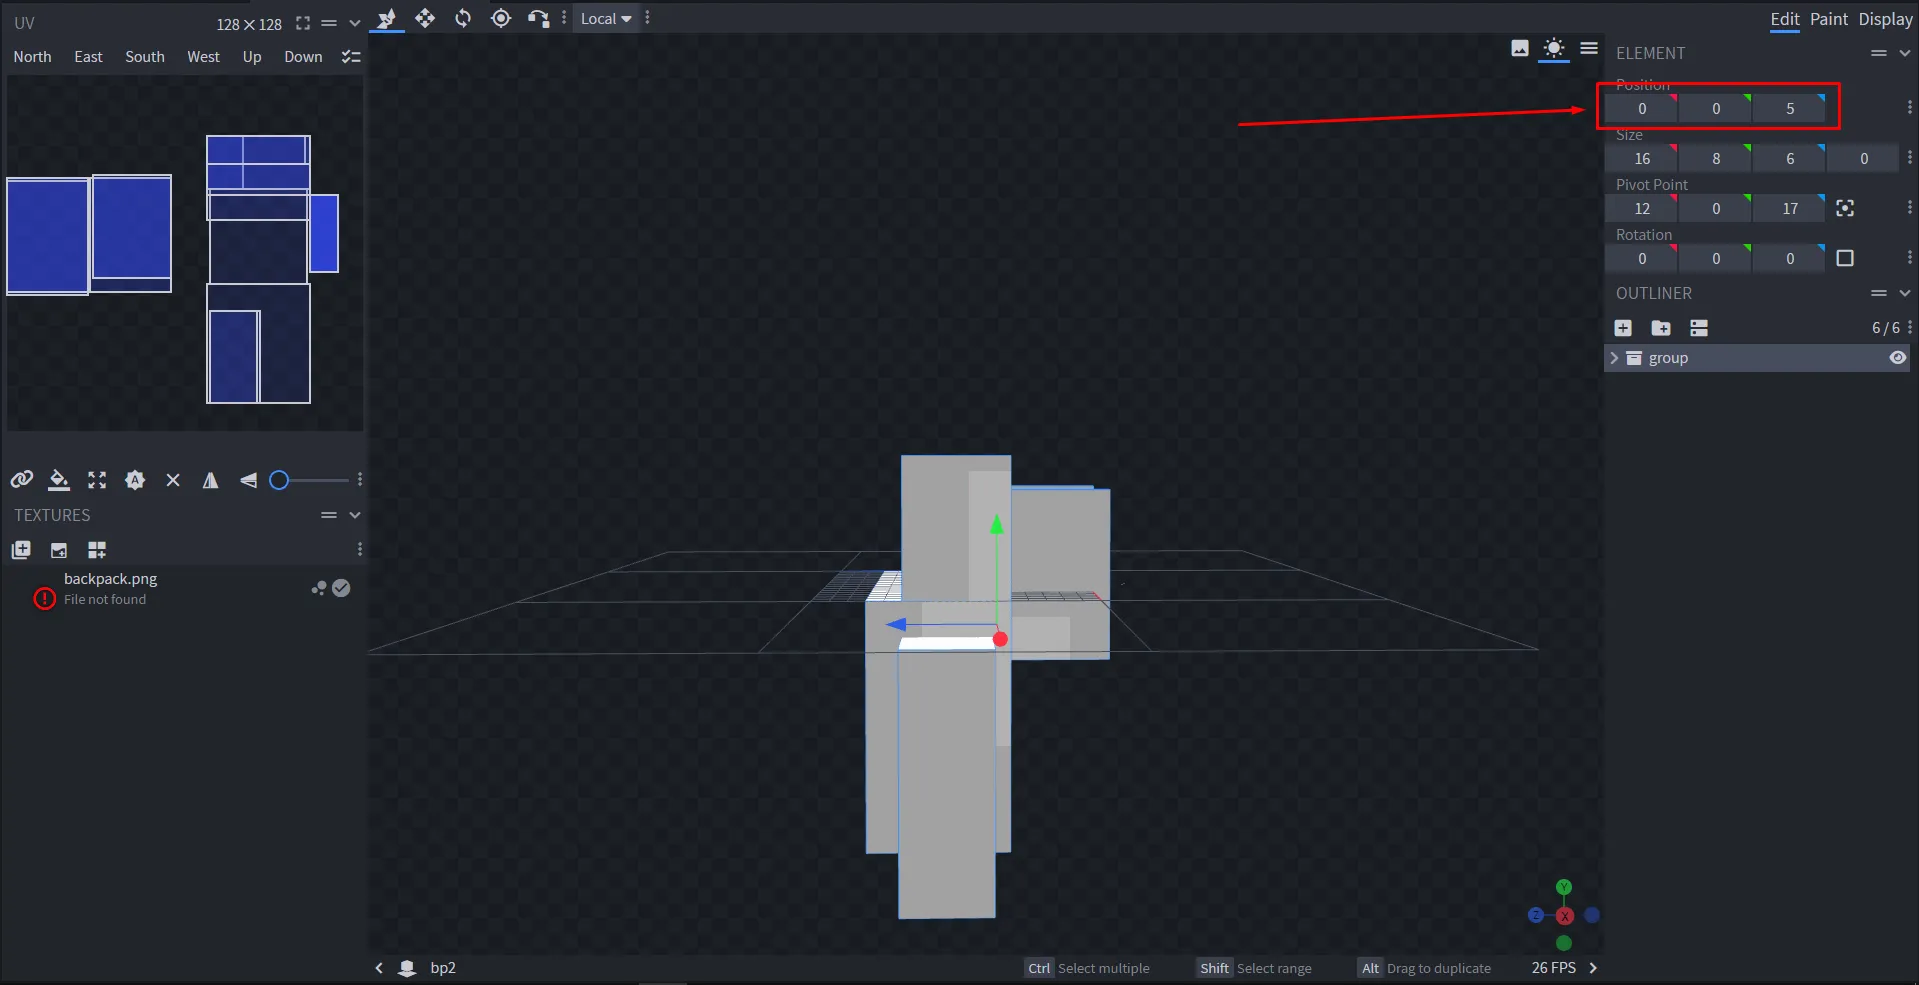
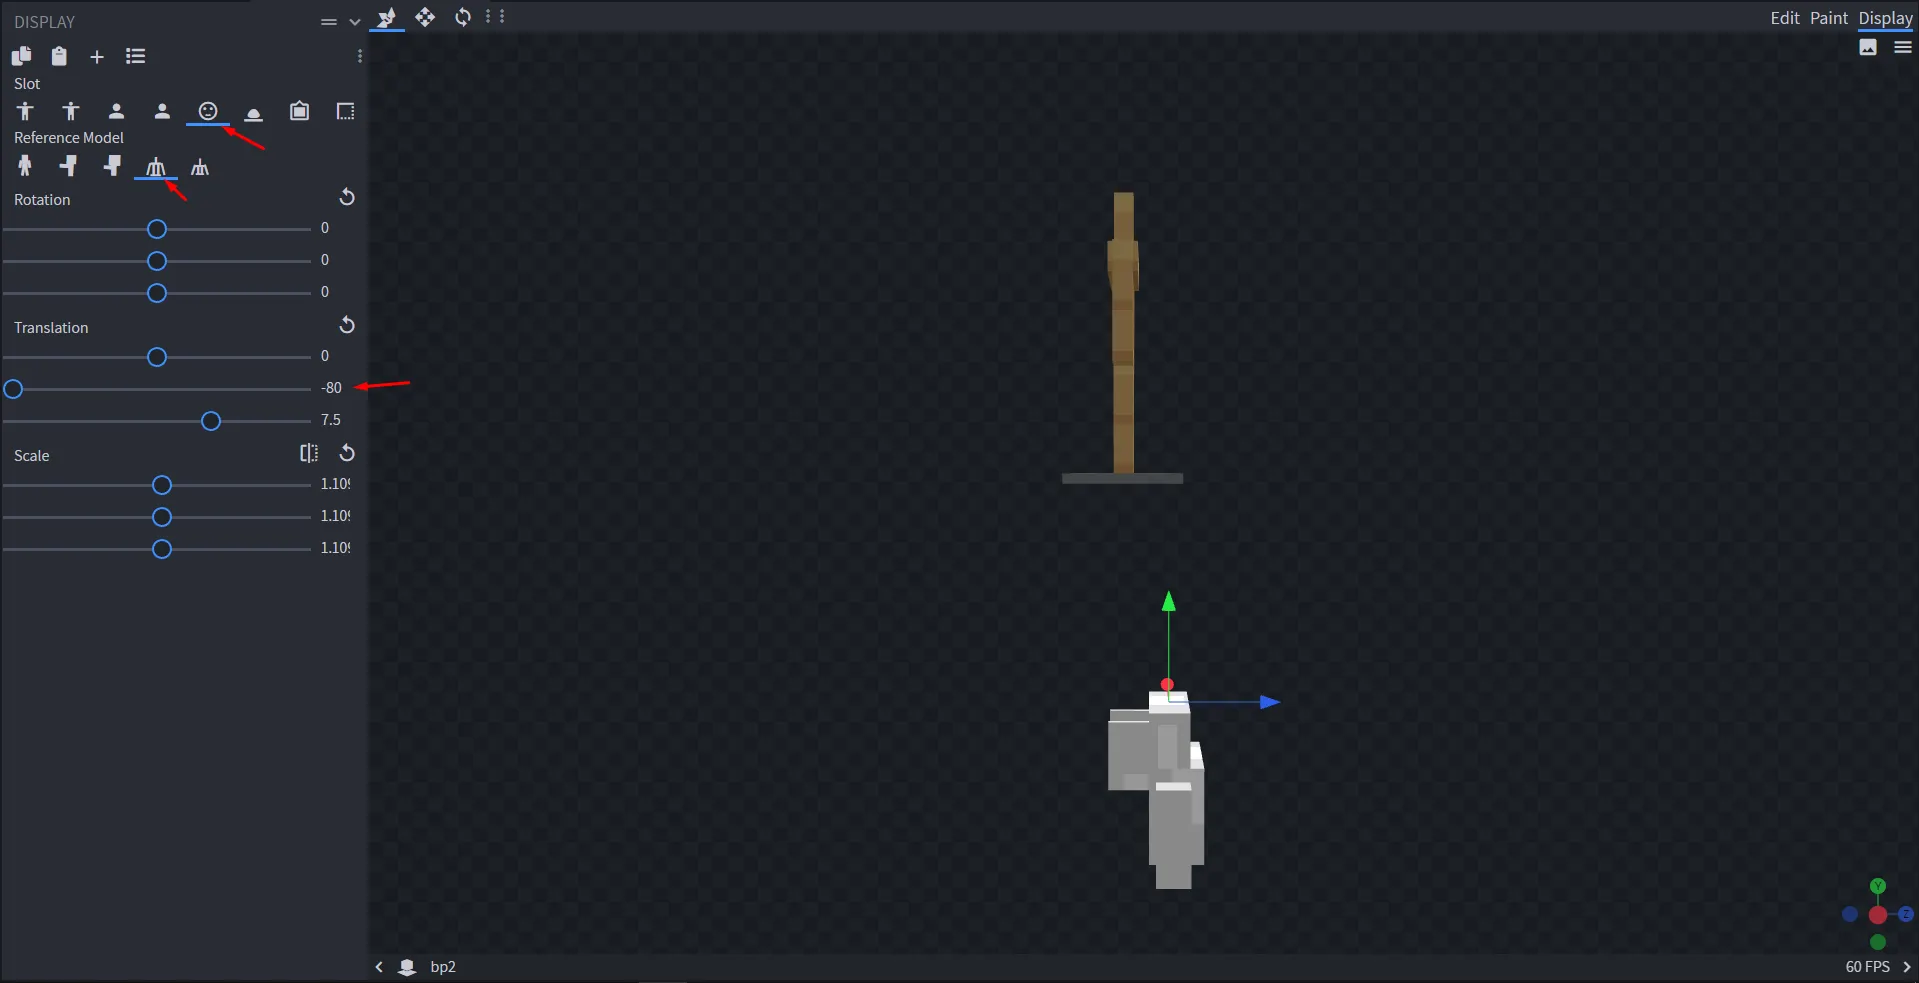
And here is how a first-person backpack is created:
- Cosmetic file:
yaml
# Example YAML configuration for creating a first-person backpack with CraftEngine.
cosmetics:
  creeper_backpack:
    permission: 'cosmetics.creeper_backpack'
    item:
      display: '&bCreeper Backpack'
      craft-engine: 'pack_id:backpack' # Backpack item ID from CraftEngine that everyone will see.
      lore:
        - ''
        - '&aSupport the creepers!'
      unbreakable: true
      glow: false
      hide-attributes: true
      modeldata: -1 # model data is not required here.
      for-me: 'craft-engine;backpack_self' # craft-engine;<id> - Item for first-person view.
    colored: true
    type: BAG
    distance: 100 # distance at which players will be able to see the backpack.
height: 3 # this is the height at which the backpack item will be set for the player themselves.- BlockBench file:
Finally, there is the last option for the backpack:
yaml
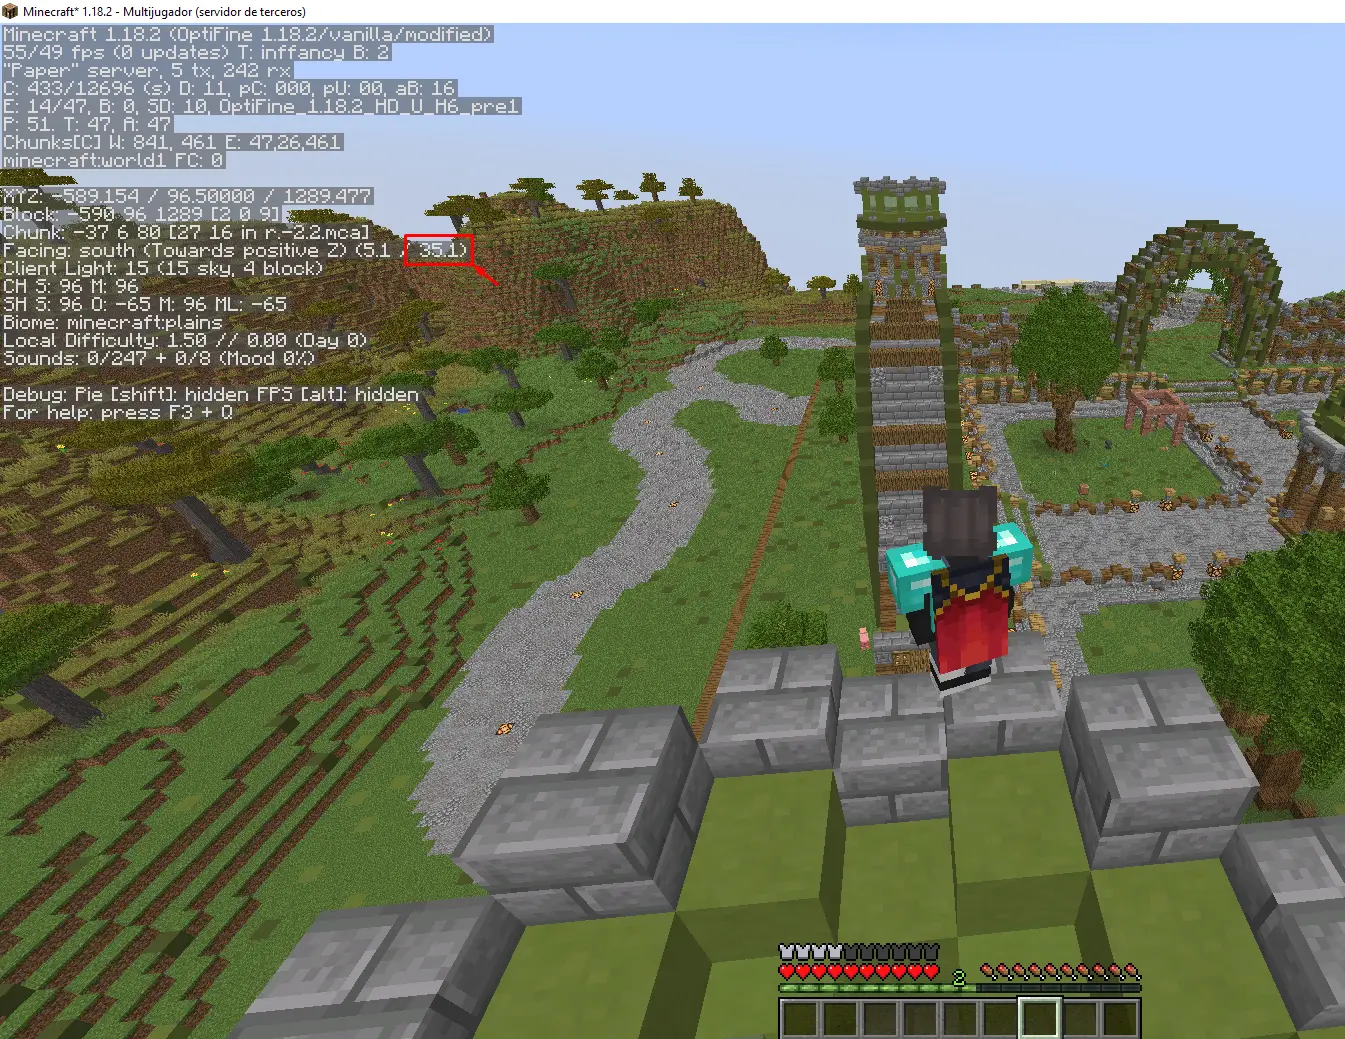
space: 30 # if the player's view pitch exceeds this number, the backpack will disappear; if not, it will be visible again (affects only the player wearing the backpack, for others the backpack remains in place). If you do not want the backpack to disappear, remove this parameter or set it to 0.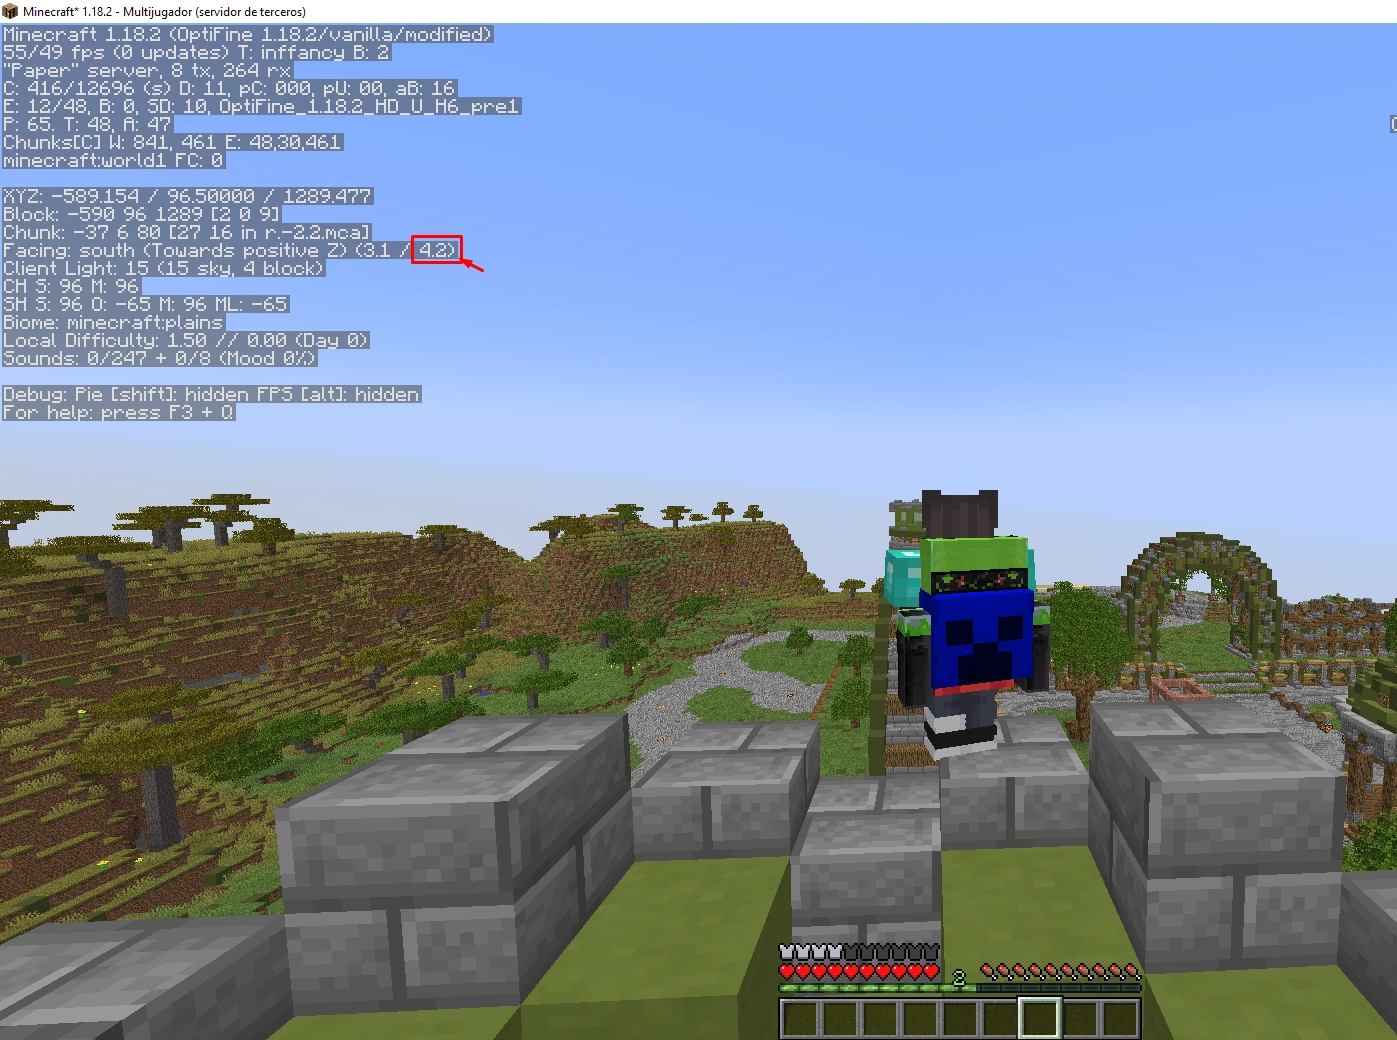
Off Hand
Creating off-hand cosmetics is as simple as creating a hat. Here is an example:
yaml
# Example YAML configuration for creating an off-hand cosmetic with CraftEngine.
cosmetics:
  magic_off_hand:
    permission: 'cosmetics.magic_offhand' # permission to use the off-hand cosmetic
    item:
      display: '&bMagic Off Hand'
      craft-engine: 'pack_id:magic_offhand' # Off-hand item ID from CraftEngine
      lore:
        - ''
        - '&6Very Magical!'
      unbreakable: true
      glow: false
      hide-attributes: true
      modeldata: -1 # model data is not required here.
    colored: true # cosmetic can be dyed/colored
    type: WALKING_STICK # cosmetic type (using WALKING_STICK refers to the plugin mechanics)
    overlaps: true # If this option is enabled, you can use an item in the off-hand and the off-hand cosmetic simultaneously.
Balloon
Let's start with a balloon with CraftEngine support:
- Cosmetic file:
yaml
# Example YAML configuration for creating a balloon with CraftEngine.
cosmetics:
  balloon:
    permission: 'cosmetics.balloon' # permission to use the balloon
    item:
      display: '&bBalloon'
      craft-engine: 'pack_id:balloon' # Balloon item ID from CraftEngine
      lore:
        - ''
        - '&aThis balloon will float in the sky!'
      unbreakable: true
      glow: false
      hide-attributes: true
      modeldata: -1 # model data is not required here.
    colored: true # balloon can be dyed/colored
    type: BALLOON # cosmetic type: balloon
    space: 1 # here you can increase/decrease the height of the balloon
    big-head: false # This option changes the position of the balloon item from the head to the right hand.
    distance: 100 # distance at which players will be able to see the cosmetic.
    invisible-leash: false # If this option is active, the balloon leash will not be visible.
    instant-follow: true # The balloon will follow you faster and almost instantly.
    rotation: # If you are not going to use this, you can remove the option
      enabled: false # choose whether this balloon can rotate.
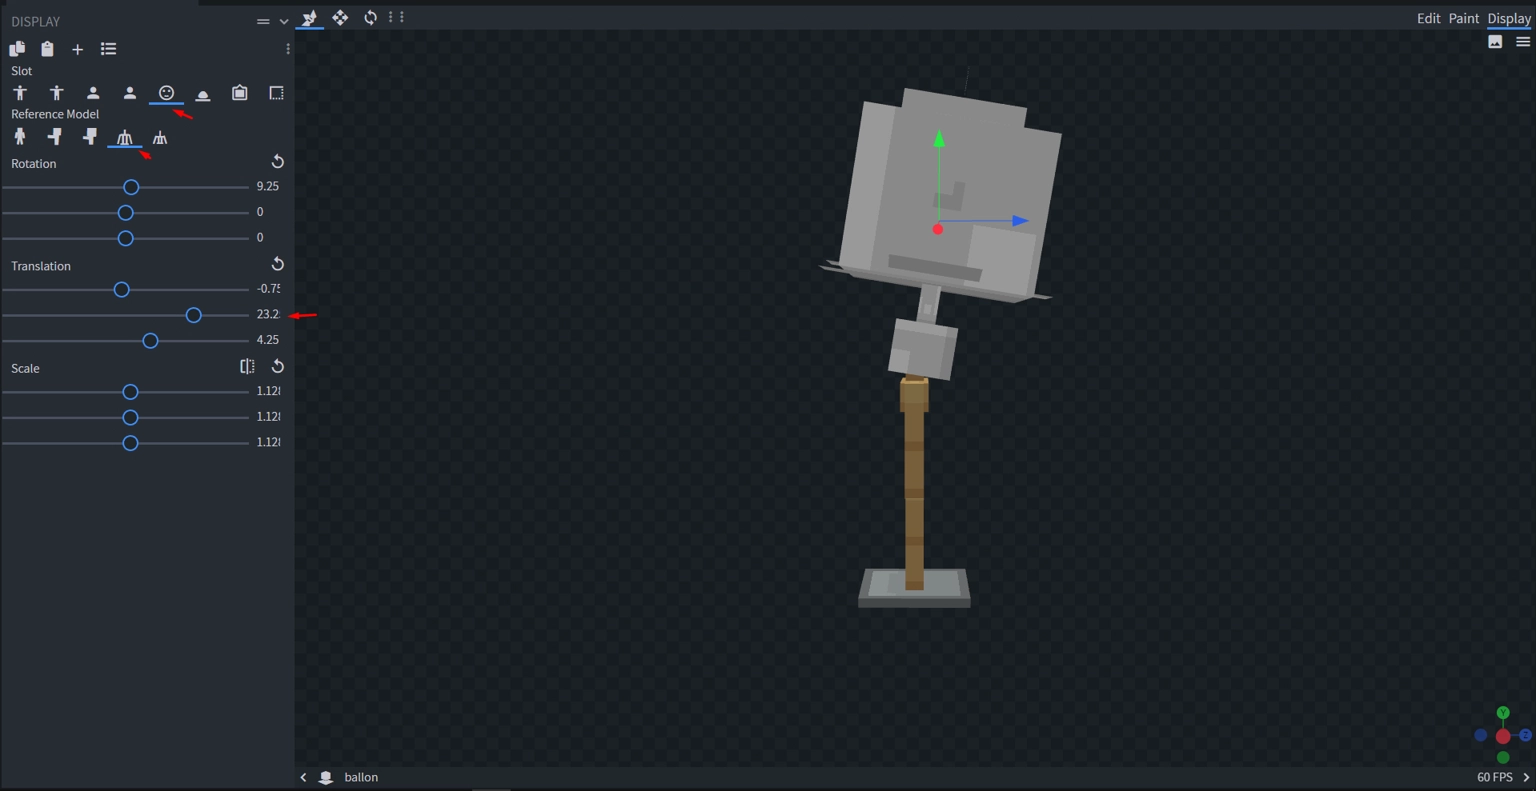
type: RIGHT # RIGHT (right), UP (up), ALL (crazy rotation).- BlockBench file for the balloon:
Now let's create a balloon with ModelEngine implementation:
yaml
# Example YAML configuration for a balloon with ModelEngine support.
cosmetics:
  balloon:
    permission: 'cosmetics.balloon'
    item:
      display: '&bBalloon'
      craft-engine: 'pack_id:balloon' # Balloon item ID from CraftEngine
      lore:
        - ''
        - '&aThis balloon will float in the sky!'
      unbreakable: true
      glow: false
      hide-attributes: true
      modeldata: -1 # model data is not required here.
    colored: true
    type: BALLOON
    meg: # Model ID from the Model Engine plugin. Warning: This will only be visible when you have the balloon equipped, meaning it will not replace the item and will not be visible in the GUI!
      model: custom-model
      colorable-parts: # this is optional; if you want all parts of the model to be colored, remove this option
        - 'partid1'
        - 'partid2'
      animations: # this option is optional; if you do not set anything, "walk" and "idle" will be used by default.
        walk: animation-walk
        idle: animation-idle
And that's it.
Finally, let's create a balloon using a CraftEngine item:
yaml
# Example YAML configuration for a CraftEngine balloon.
cosmetics:
  balloon:
    permission: 'cosmetics.balloon'
    item:
      display: '&bBalloon'
      craft-engine: 'pack_id:balloon' # Balloon item ID from CraftEngine
      lore:
        - ''
        - '&aThis balloon will float in the sky!'
      unbreakable: true
      glow: false
      hide-attributes: true
      modeldata: -1 # model data is not required here.
    colored: true
    type: BALLOON
Spray
Sprays are quite simple, actually as simple as hats.
yaml
# Example YAML configuration for creating a spray with CraftEngine.
cosmetics:
  spray:
    permission: 'cosmetics.spray' # permission to use the spray
    item:
      display: '&bSpray'
      craft-engine: 'pack_id:spray_item' # Spray item ID from CraftEngine
      lore:
        - ''
        - '&aThis spray is the best!'
      unbreakable: true
      glow: false
      hide-attributes: true
      modeldata: -1 # model data is not required here.
    colored: true # spray can be dyed/colored
    type: SPRAY # cosmetic type: spray
    url: 'https://localhost/img_url.png' # here there are 2 options: you specify the image URL or enter the name of the image you have in plugins/ECosmetics/sprays/
    item-image: false # This applies to sprays that are items, not images (they do not require a url path). If this option is activated, it will use the item displayed in the menu as the image.